Install solar panels
When can you install solar panels without a permit?
Do you want to install solar panels on your roof yourself? Then normally no permit is needed, unless you have a monument or want to install the panels in a protected village or townscape. A permit is not necessary if you follow the rules below.
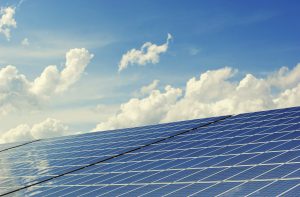
For the 10 tips how to install solar panels yourself read on below the picture!
How to install solar panels?
The solar panel must form a whole with the installation for generating electricity if it is placed outside on the roof. Or the technical installation (inverter) must be installed inside the respective building. Neighbors should not be bothered by the solar panels, this is described in the Civil Code.
If you want to install the solar panels on a sloping roof, this applies:
- the solar panel must be positioned in or directly on the roof surface
If you want to install solar panels on a flat roof, the solar panel must remain at least as far from the edge of the roof as the solar panel is high. For example, if the highest point of the solar panel is 60 centimeters, the distance from the roof edge must also be at least 60 centimeters.Do you want to install solar panels on the ground? You can. It is important that the entire installation is not higher than 5 meters, and that they are placed according to the zoning plan. However, it is advisable to contact the neighbors beforehand in order to prevent any complaints later. In addition, you can contact the housing department of the municipality to coordinate everything.Do you want to read again exactly how the government has formulated this, look at the site of the National Government.
Do you want to install solar panels yourself? Here's what you need to know:
10 tips for install solar panels
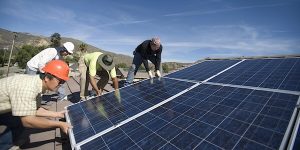
Solar panels can be installed yourself, if you are a little handy. In my quote for 22 panels on a flat roof, the installation cost was over €1,300. A handyman could save that. This way you will have earned back your solar power installation sooner. Partially installing it yourself is also a choice. The electrical part could be outsourced and the installation of the panels done by yourself.
- Which direction? The installation should preferably be done on the south (in the direction of southeast to southwest). On the west or east is also possible, but gives less return. That may mean that you can work with a smaller inverter and thus reduce the investment.

- On flat roof or on sloped roof. On a pitched roof you install the panels on the roof surface and so the angle of inclination is the same as the angle of inclination of the roof. Optimal is about 35 degrees. On a flat roof, you can determine the angle of inclination yourself. In any case, make sure there is no shadow of one panel on the other. Is somewhat unfortunate for the yield. If several roof surfaces are suitable, for example on different sides of the roof, you can install more panels.
- Connecting in parallel or in series? Most solar panel systems are connected in series. A serial circuit allows that voltage to build up sufficiently. The disadvantage is that the yield of the entire system is determined by the least performing solar panels. Such as solar cells that are in the shade or that are not performing well. By connecting groups of panels in separate strings to the inverter, you prevent one panel in the shade from affecting the yield of all solar panels.</li
- Expansion possibilities. Think about expansion possibilities now. Where do you want to install the solar panels and where can you install more solar panels in the future if you use more power or have an extra budget? Then also pay attention to the inverter you choose. If you want to be able to expand in the future, it is wise to choose a slightly heavier inverter so that you only have to invest in extra panels and not an extra inverter.</li
- Metric box. Installing solar panels with a capacity of 600 Wp or more will require a free group in the meter box. If you don’t trust yourself with electrical, call in an electrician for this.</li
- Electricity meter. Make sure your electricity meter can turn back, if the solar panels produce more energy than you consume. The yield of the panels is offset against your consumption. How this is done depends on the type of electricity meter. In practice, a digital smart meter is most commonly used. This also records how much you feed back into the grid.</li
- Ventilation of solar panels. When installing the panels, make sure there is ventilation space under the panels. This will prevent the panels from getting too hot and having trouble delivering the optimal amount of power.
- Place inverter. It is recommended when installing solar panels to keep the distance from the inverter as small as possible. They should also not be too close to the edge of the roof because of weather conditions such as storms and high winds. Keep any obstacles in mind, trees or the chimney can cause shadows.
- Support structure. Also check if your roof can support the weight of the solar panels. Normally this is not a problem at all, but it would be annoying if the next morning you could see daylight coming into the place where you installed the panels yesterday. For a flat roof, allow for a load of 150 kg per m2 for the installation of the panels.</li
- Measure yield. Finally, you want to be able to monitor how much energy your installation is generating, to know how much money it is saving but more importantly, whether nothing strange is happening. In case of an unexplainable energy dip, something probably needs to be adjusted. This software is supplied free with the inverter and is also available as an app on your smartphone.
Installation parts
Solar panels
It will be no surprise: solar panels are the most important part for installing solar panels. To generate 3500 kWh each year, you need about 12 solar panels. Solar panels with high efficiency are much recommended when the area for the solar panels is not very large. But when there is a lot of space on the roof, you can choose classic solar panels. These classic solar panels have lower efficiency but also have less cost.
Many manufacturers offer a 25-year warranty to the panels. This guarantees the yield over the warranty period. Most manufacturers give a guarantee of about 80% of the yield. At the same time, solar panels lose 0.5% of their output each year, and this is also taken into account by the manufacturer.
Inverter
After the solar panels, the inverter is the most important part of the installation. The inverter ensures that the electricity that is generated can be transformed into electricity that can be used. Solar panels generate direct current. In the household, mostly alternating current is used, the inverter ensures that this is converted.
The inverter is not a fan of heat. This can make it work less well. It is therefore very important that the inverter is placed in a place where it can ventilate well, so that the heat can escape.
In recent years there has been a rise in micro-inverters. The number of micro-inverters is equal to the number of solar panels. The advantage of this is that each solar panel works separately, and thus can achieve a better efficiency.
Support structure
Also a very essential part when you install solar panels: a support structure, on which the panels are mounted. This support structure is installed in the roof. There are different types of support structures, which you also attach to the roof in different ways. A support structure must be able to withstand all weather conditions for at least 25 to 30 years. Therefore, most support structures are made of aluminum or stainless steel.
A different support structure is used on a flat roof. On a flat roof, a support structure can be installed at the ideal angle of inclination, 35 degrees.
Cabling
The cables of an installation go from the panel to the inverter and from the inverter to the meter box. The cables from the solar panel to the inverter are outside. Therefore, these cables are well insulated to continue working well in extreme weather conditions. Most cables used for this purpose are double insulated. The second cable goes from the inverter to the meter box. This cable carries alternating current, which is distributed to the electrical devices in the house at the meter box.
Connecting solar panels to the meter box
PV distributor
When you are going to install 4 to 12 solar panels, in some cases it is possible to use existing cables/pipes to bring the generated power from the inverter to the meter box. A PV distributor splits an existing group into 2 groups. This allows the power to run through an existing connection to the meter box.
A PV distributor can be a good solution when there are no extra cables present or available. This avoids the need to lay extra cables, which saves extra costs. A PV distribution board may not contain more than 3500 Watts, therefore it is only an option for smaller solar panels.
Free group
When you install solar panels, it is important to consider the capacity of the main connection so that it is not overloaded. Many households have a phase 1 connection. This means that there is only one cable that brings power into the meter box. Nowadays it is increasingly common to have a 3-phase connection. This means that 3 power cables go to the meter box. When there is a 3-phase in the house, there is a larger current capacity. A larger power capacity can affect the amount of solar panels that can be connected.
The size of the main connection can be found on the energy company’s annual report. In addition, you can request it from the grid operator.
Selectivity
For the ratio between the main insurance and the group box fuse, the term Selectivity is often used. To make sure that the main fuse does not blow and cause the whole house to be without power, the group box fuse must always be 1.6 times smaller than the main fuse. If there are several appliances on in the house at the same time, there can be so much current draw that the main fuse blows.
Only when solar power is supplied by an inverter does this not apply. This is because an inverter is the only device in a group (because it is always connected to a free group) and it cannot supply more power than the technical capacity of the device. The inverter itself already prevents the overload. Only the inverter’s maximum current strength must be less than the fused value of the free group.
Earth circuit breaker
In a meter cupboard there is one earth leakage switch for every four groups. It is not advisable to connect solar panels to one of the four groups. If another device causes a short circuit, then all four groups will break down (so after installing solar panels, these will also break down).
Inverter installation
For safety reasons, the inverter must be de-energized before you start you install solar panels. Both on the side of the solar panels and on the side of the grid (alternating current).